Pages

Saturday, June 30, 2012

Star Spangled Glow in the Dark Ring Toss

Are you ready for the 4th of July yet? Have you scoped out where to go see the best fireworks? I googled the whole DFW metroplex today, and found out Granbury, Texas has an amazing show. It is a really small town, but apparently they have an enormous fireworks show. It was ranked in the top 10 in the Southwest and top 50 in the nation. It is tomorrow night...so we will see if I can keep the kiddos up late enough to go at 9:40pm. Yikes! Today we made a Star Spangled game to play in the dark.


We started playing as soon as it was completed. Our rings for the ring toss were made out of two glow in the dark bracelets put together. They held together even better then I expected.


Supplies:

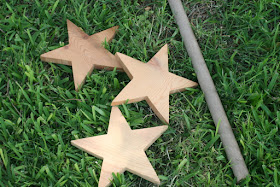
3 wooden stars
Dowel rod
Wood glue
Red, white, and blue paint
Glow in the dark bracelets


All of my supplies were left over from previous projects. The dowel rod was just long enough to cut into three sections. I used wood glue to adhere the dowel rods to the wooden stars.


Next, I painted them red, white, and blue...the obvious patriotic color choices of course.


Game on! My son is so competitive and we are really working on sportsmanship and behavior. Lol! At first I kept telling him he could not be a "bad sport" when we played games. It took me a while however, to realize he did not know a "bad sport" meant a poor loser or attitude. He just thought I was telling him he was horrible at it. (That was what he was already upset over) Oops. Lesson learned. Sometimes, I just think my kids are little grown ups and I don't even realize what they don't know yet. I really want to teach him it is just about having a good time and trying.


As it grew darker, we grew better, and the boys loved how the rings glowed in the dark. Did anyone else notice that pesky little cricket that jumped into my picture for his "superstar" moment on the red star?

Have a wonderful 4th of July!!!

Monday, June 25, 2012

Deviled Eggs Without Mayo

Sorry I have been missing in action. I went to an amazing destination wedding in Mexico for my husband's cousin. My husband and I left the kids with my parents, and had a wonderful vacation with almost 30 friends and family. (Our family does not do anything small). The wedding was gorgeous and I will share pictures very soon.

In the meantime, the 4th of July is just around the corner and our family always has a large pool party. One of my favorite pot luck foods is deviled eggs. But...does anyone dislike mayonnaise as much as me? Ok, even if you don't, I love making deviled eggs with ranch. I feel like it is hard to screw any recipe up with ranch in it. Yum!


Ingredients:

Hard-boiled eggs
2 tbsp sweet relish
1 tsp mustard
1/2 tsp salt
1/4 cup ranch dressing
Paprika


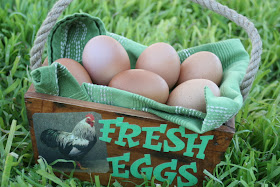
I love use fresh eggs from our house to make deviled eggs. However, hard-boiling fresh eggs can be harder, because the shell does not like to peel as well. That is why my eggs may appear a little misshapen. Ha! It is reccomended in most recipe books to wait at least a week from when you buy eggs at the store to hard boil them.

Directions:

1. Hard boil eggs. Peel shell and cut hard-boiled eggs in halves lengthwise


2. Remove yolks and mash with a fork until fluffy in a small bowl. Mix in sweet relish, mustard, salt, and ranch dressing until smooth.


3. Fill a plastic bag with yolk mixture. Cut corner of bag to create a small hole to pipe filling into each egg white. Chill until ready to serve. Garnish with paprika and parsley if desired.


If you are a ranch lover like me you may like this recipe for Last Minute Ranch Potatoes too.


Wednesday, June 20, 2012

Rustic Country Wedding Party

The party day finally arrived! Yipee! As you know, I have been planning a party for my husband's cousin and fiance. I wanted it to be perfect, as I am sure we all do, when we throw an event. The tough part was I had no idea how many people were coming. I had two RSVP out of about 40 invitations I sent out. It is so sad that sending a RSVP is a lost art. (frown) Oh well, I planned for the best and just made sure we had plenty of food to go around.


The decor is obviously rustic country. I dug through my storage building and found this old coke carrier. I made a little burlap flag sign with their last name. All it took was a sharpie marker, some twine, a glue gun, and 5 minutes.

The mailbox is a new treasure I found at a garage sale last weekend for 50 cents! It added a fun twist to the table, and it allowed me somewhere to store the wedding mad libs. Does anyone remember mad libs as a child? My sister and I used to do them all the time. You fill in nouns, adjectives, etc into blanks. Then those words copy over into a story.

For the wedding mad libs the story went something like this...

When Matt met Sara he was ____________. He noticed her _______ immediately.

However, subject to the wrong and inappropriate words...the story can be quite hilarious. Click here for a link to an example of a wedding mad lib you could use.


As my husband and I were preparing for the party, I quickly realized I was running out of table space. Desperate, I wrapped a piece of plywood in burlap, and laid it on top of our wheel barrow. I then used two huge tree trunks for my rustic cupcake stand.


The tables were decorated with white tablecloths, burlap tied with twine, silver lanterns with fake sunflowers and rocks inside, pictures of the precious couple and personalized brown paper hearts with mints inside. Click here for directions on how to make the personalized candy filled wedding favors.


My husband helped me by cutting up a tree limb I salvaged from out back at work. He cut a groove down the center to hold the photographs. It is always so windy at our house out in the country, that I had to put a little hot glue in the groove to keep the pictures from flying away.


Keeping with the burlap theme, I stamped a black M on some burlap strips and fastened them around the silverware.

The soon to be newlyweds. (smile)


I wish I had a lawn out of a Southern Living magazine, but I don't. It was still pretty, even with the playground and goat pen in the background. Lol! The city folks got a big kick out of the goats in their pen and the chickens roaming around.


We went with a simple menu of sandwiches, pasta salad, fruit, and chips and dip. The mayo and mustard was put in old mason jars with twine tied around them.


I used little chalkboard signs I made for a birthday party a long time ago to label the food. I just switch out the ribbons on the miniature chalkboard signs to match the theme and decor of each party I throw.


Since they are having a destination beach wedding, I created these little cupcakes with a beach, umbrella, and beach ball. They were really rather easy to make. All it took was some blue icing, peppermints, and graham cracker crumbs for sand.


Some of our lovely guests.


Here are the wedding mad libs. They were actually a big hit. The bride to be designed them and brought them to the party. Everyone got a huge kick out of them.


Again, out of table space I used two trunks to put the gifts in. Since it was a dual party, the Stock the bar gifts went in one trunk, and the lingerie shower gifts went in the other trunk.


Ooooh la la


I wish I was a better night photographer, but you can see the lights hanging from the trees. It was gorgeous as the sun went down and completely set the atmosphere I was looking for.


Thanks everyone for coming!

Monday, June 18, 2012

My Family Fun Magazine Feature...Make Flip Flop Imprints in the Sand

I am so excited! One of my ideas made it into Family Fun Magazine this month (June/July 2012). Even better, they give $100 prizes for creative ideas. Last year, when I first started my blog, I noticed the My Great Idea feature in Family Fun magazine. It says, "Send it to us and you could earn $100!" I thought...hmm..what the heck...it is worth a try. I was shocked last month when I was contacted by email from someone on the editorial team. They were completing the fact checking before publication. Yipee!


Did you get your Family Fun magazine this week? Look for me on page 44.


I even got a half page. Isn't that mermaid towel so cute too from Kim Fuglestad of Wrightstown, PA?

Here is my original post...

Are you ready for some flipping flopping fun?


Supplies:

Flip Flops
Foam Cut Outs or Foam Stickers
Hot Glue Gun

We started out with some regular flip flops. My oldest son and I took some foam stickers and decorated the bottom of them with animals and words. We put two on top of each other to increase the thickness. The stickers would not stick well enough on their own, so we ended up using hot glue to adhere them to the bottoms side of the flip flops. (Worked like a charm!) Then we headed out to the beach to try them out. Did I mention we live in Texas? Ok, we really went to a man-made beach by a lake. 
In motion flip flop pictures were impossible!
LESSON LEARNED...You must be smarter then the flip flops and expect a mirror image. The first pair we made had his name on them and it came out backwards!

The sand imprints were even better then I expected.
The animals were the easiest because they can not be put on backwards. For our second attempt, we put the letters on correctly in mirror image format. You must use regular foam cut outs, not stickers, for words. The problem is stickers end up with the sticky side facing towards the sand. Please learn from all of my mistakes. Ha! I enjoyed this project because it was fast, simple, and we had all the supplies needed floating around our house.
 Now go out and make some amazing flip flops of your own.

I hope your summer is wonderful and you have lots of...


Saturday, June 16, 2012

Father's Day Printable

We finally got around to our Father's Day gift/card today...almost too late. I had my oldest son answer some questions about his dad. I thought it would be a fun tradition to start. The answers can be quite interesting. I love that he said I love to call my dad...Stinking Old Dad. Ha! Ha! He really does call him that though. The question is...would we remember that 5, 10, or 20 years from now? Well, we will now. This is my son's All About My Dad...


The printable is available here. This is a great idea for a last minute gift addition or even if you forgot to pick up a Father's Day Card to go with your gift. I know my husband's heart will melt over these simple child like responses about him. I am pretty convinced his favorite food is not fish and he does not even drink Coke. Lol! It is interesting to see how our children see us through their eyes.

Friday, June 15, 2012

"Cupcake" Sandwich and Father's Day Ideas

My two year old is so busy and on the go that it is getting hard to get him to eat some meals right now. We sit down for dinner every night and sometimes he can go 30 minutes without even taking a bite. (I wish I had that kind of will power!) However, he is never too busy to ask for sweet treats if they are around. I almost tricked him on this one...it is a sandwich disguised as a cupcake.


Doesn't it look at least somewhat real? I am definitely sending these fun sandwiches in the boys lunch boxes next year.

Ingredients:
White bread (wheat just looked more fake)
Peanut butter or meat and cheese
"Cherry on top" (I used a skittle)
Saran wrap
Cupcake Wrapper

Directions:
1. Take a slice of bread and place it on a piece of saran wrap. Top it with either peanut butter or meat and cheese. You may cut off the crust but I chose not to.


2. Fold up the four corners of the bread together.


3. "Bundle" it up into a ball shape. This step is hard to describe so hopefully the picture helps.


4. Place it in your cupcake wrapper and top it with a cherry skittle.

5. See if you can fool your child, or at least make them smile enough to enjoy it!!


Father's Day is just a few days away. I have not finished my gift yet, so I can only share some ideas from the past right now.


Father's Day Gift for Golfer...for a Tee-rific Dad!


Make your own Father's Day Card with a Tie


Father's Day for a Cook...Personalized Cutting Board

I hope you have an amazing Father's Day gift planned!


Tuesday, June 12, 2012

Traveling Book Box...Monkeys

In case you missed my original post, I dreamed up the idea of traveling book boxes. Click here to see my original idea and the Bug Book Box. My goal is to get 4 to 5 different boxes completed to trade with my son's friends throughout the summer. It is almost like summer camp coming straight to their house.


I included the above picture and the following book box contents:

 
Monkey Book Box Contents

 
·         Curious George Goes To An Ice Cream Shop by Margret and H.A. Rey’s
(Please let your family keep one for your book collection)
·         Curious George stuffed animal reading buddy
·         Five Little Monkeys Reading In Bed by Eileen Christelow
(Please let your family keep one for your book collection)
·         Five Silly Monkeys Book
·         Monkey Plates to serve your lunch or dinner on
·         Curious George monkey skewers. Cut up bananas…or anything you have at home to serve a monkey snack. Hang one of the green monkeys off your child’s drink or sticking out of their sandwich or snack.
·         Monkey Game-May use in conjunction with books. Practice counting and attaching the monkeys with their correct number or number of pillows.
·         Curious George coloring book. Tear out a page or two and color with your child.
·         Curious George images. Glue some to paper and let them help write their own short story or describe what is happening in the picture to you. (Gluestick)
·         Have fun! Make sure everything on this list is returned to the book box for the next child.
·         Let me know when you have worn out your book box and we will trade. I am hoping to trade about every 3 weeks and just meet up with you. Thanks! Michelle
 
Ok...for the monkey game...I found this clever idea at Repeat Crafter. ( I had trouble printing from her linked site, but was able to copy and paste each image into a microsoft word document)  Here is what my little monkeys looked like.


I found this image for a monkey head to use on my clothespins. I used microsoft word to make it smaller and to make enough for 8 little monkeys


The monkey box went first to my friend's son Naaman. This is what he opened to find...


Coming soon...Flip flops and Ice Cream book box.

Sunday, June 10, 2012

Personalized Brown Paper Candy Pouches

Well, I am still in wedding planning mode for the party this weekend. (Stock the Bar and Lingerie Shower). I want it to be intimate like a wedding reception, because my cousin and his fiance are having a destination wedding. Granted, there are about 30 people going, but that just means there are another 50+ that are not. I saw this cute idea for candy pouches on Peppermint Plum. I thought they would make perfect little candy pouches to set around the tables at dinner with mints or snacks. I went to my trusty stamping set and began stamping their last name. I wanted to jazz the brown paper up a bit.


Supplies:
Brown paper or bag
Pencil or pen
Scissors
Stamp set (optional)
Sewing machine
Candy or snack

Directions:
1. I used a brown paper sack from the grocery store to make my heart candy pouch wedding favors. I was able to make sixteen hearts out of one bag. I made a template out of heavy paper and traced my hearts.


2. Next, I stamped the hearts with the wedding couples last name to add a personalized touch. My stamping was not perfect with the stamps I had, but I kind of like the messy look of extra ink. For some reason, I think the extra ink adds a vintage flare.

3. Begin stitching around your candy pouch, allowing a small opening, to insert your candy or snack through.


4. Carefully finish sewing to close the pouch.

5. Guests may just rip the brown paper candy pouch open for their treat!


Of course, you can make these candy pouches for anything. Some ideas I thought of were classroom favors, baby shower favors, teacher appreciation gifts (apple shape), or just lunch box treats.
Brown paper is so versatile because it can be drawn on, painted on, run through your printer, or stamped on for decoration. Good luck making a favor for your favorite upcoming event!


Labels: DIY Wedding Favors, Wedding snacks, Easy wedding favors, Personalized wedding favors, personalized baby shower favors