Friday, November 30, 2012

Duck® Tape Holiday Projects

This is a Sponsored post written by me on behalf of Duck Brand® for SocialSpark. All opinions are 100% mine.

I am sure you all have seen Duck® Brand tape all over Pinterest and the internet. I am constantly amazed by the projects created by this inventive wonder. Do you even know why Duck® tape was invented? It appeared around World War II as a solution for multiple issues. It could repair trucks, cracked windows, seal containers, and much more. According to duckbrand.com, polycoat adhesives gave the tape its unshakable stick and polyethylene coating allowed them to laminate the tape to a cloth backing, making it extremely strong and flexible.

However, Duck® tape has become very popular in the crafting community. With the holidays around the corner I can only imagine the wonders I could make with holiday themed Duck® Brand tape. I made this santa soap last year with Duck® tape. Here are just a handful of fun ideas I found.

Santa Soap by Greene Acres Hobby Farm

Christmas crafts with colored duct tape

Christmas wreath by Chica and Jo

Christmas crafts with colored duct tape

Trees by Chica and Jo

Duct Tape Stocking and Holiday Gift Box

Stocking and Gift Wrap by JoAnns

  Duct-tape Christmas-tree design on cardstock

Christmas Card by Lowes

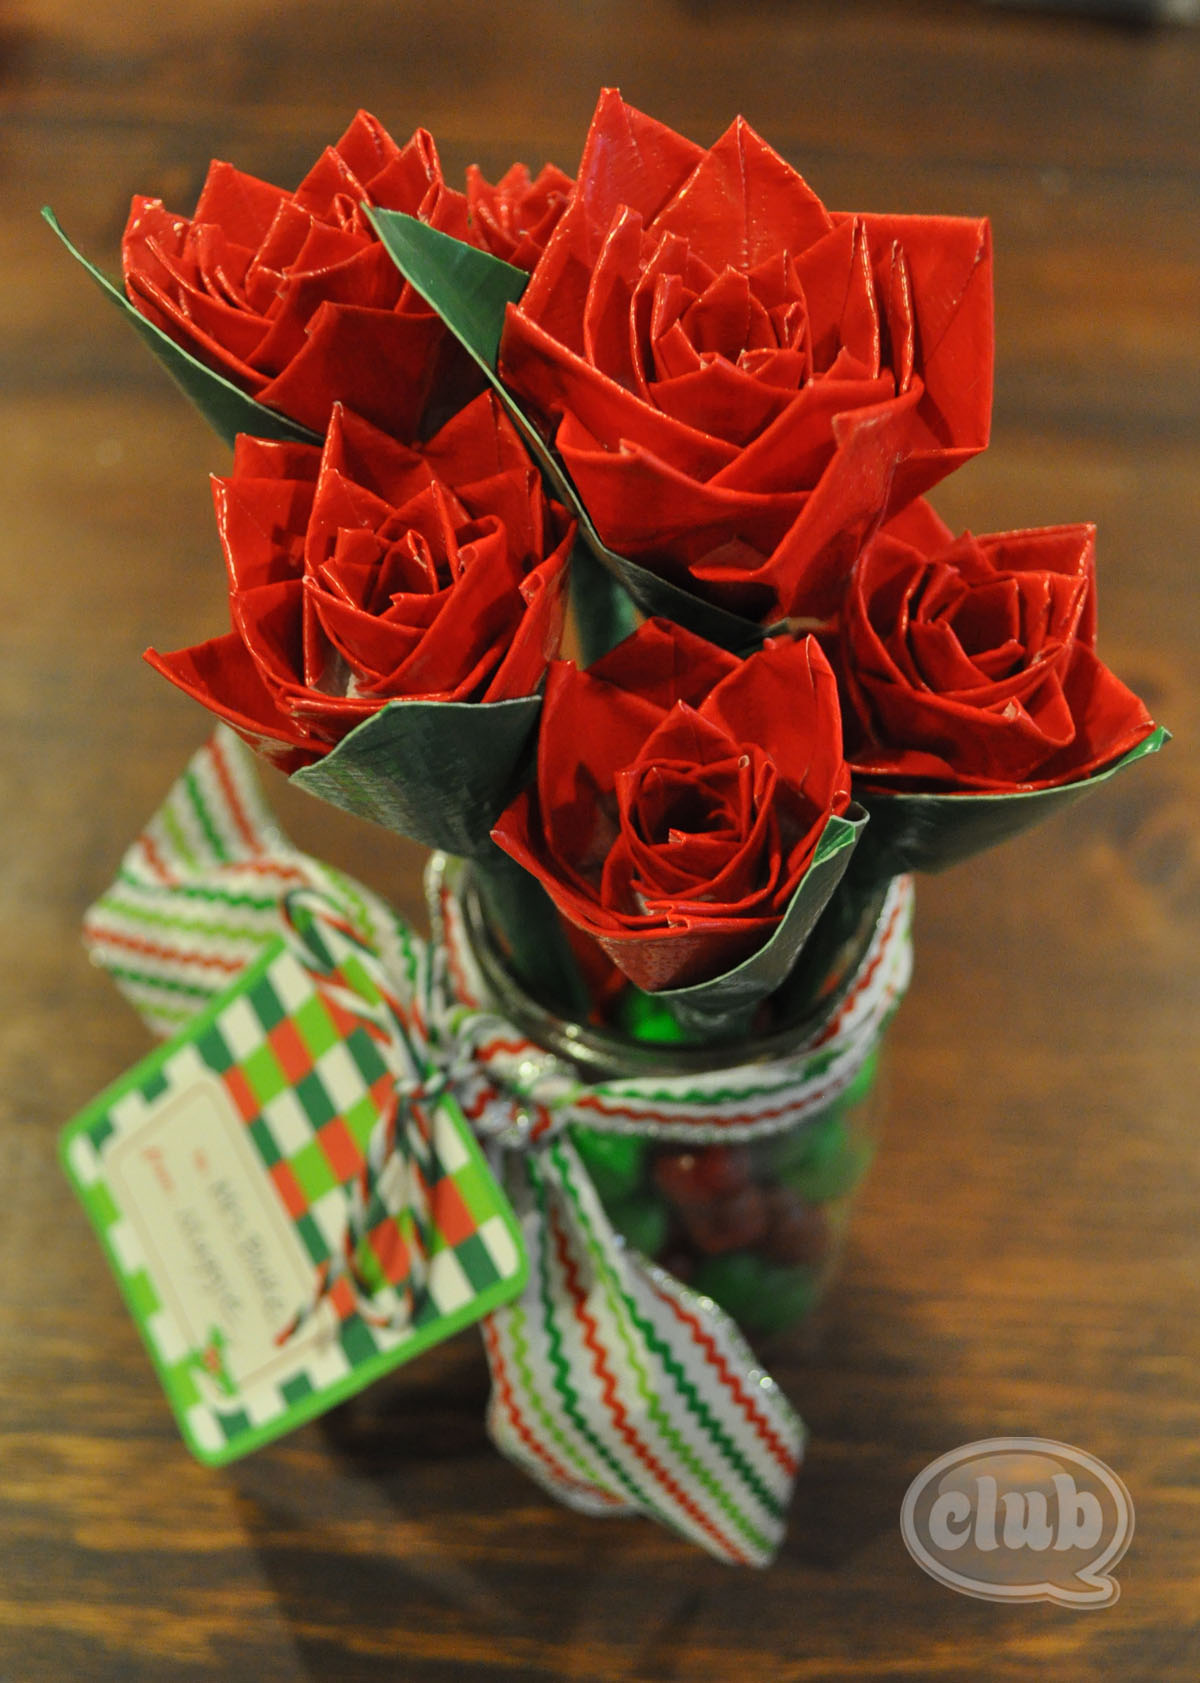
Rose Bouquet  by Club Chica Circle

Pinned Image

Clutch as a Gift by Valerie Creations

Do you love Duck® tape too? Become a fan of Duck® tape on Facebook. Share your ideas and see fun ideas from others.

You may also order Duck® tape online at duckbrand.com. I browsed their site for almost an hour looking at all of the fun prints and varieties of Duck® tape. I still think my favorite is the traditional peppermint style print. I would love to make some huge candy canes for my front yard!

Do you have any fun Duck® tape holiday projects on your agenda?


Visit Sponsor's Site

Thursday, November 29, 2012

Mrs. Smith Signature Deep Dish Pies

This is a Sponsored post written by me on behalf of Mrs. Smith's for SocialSpark. All opinions are 100% mine.

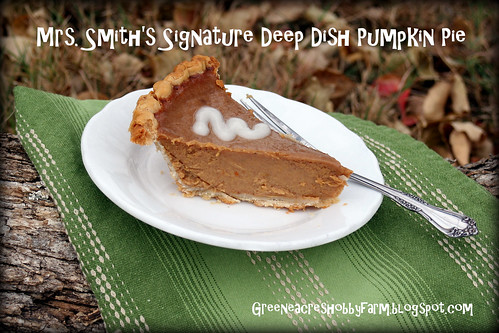
I was so excited when I was selected to try Mrs. Smith's Signature Deep Dish pies. I have never made a frozen pie myself, and with Thanksgiving around the corner, I was overjoyed to be able to let someone else make the pie (Mrs. Smith). I was more then willing to throw it in the oven and cook it! With two little kids running around my house excited about the prospect of seeing all of their grandparents and cousins for the holiday, cooking can be challenging. My boys not disturbing me while I was trying to cook, was not at the top of their list! The first pie I tried was the signature Deep Dish Pumpkin Pie. This is such a classic Thanksgiving food that I can not go without.

IMG_3445

MrsSmith.jpg

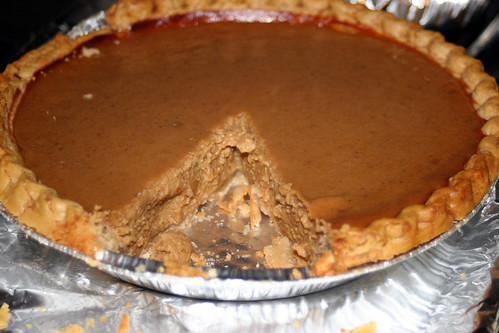
I followed the directions which were simple and well written. I removed the cover off the pie, left it in the foil pie pan, and placed it on a foil covered baking sheet. Voila. My pie was prepped to cook. I placed it in the oven at 350 degrees for 90 minutes. It came out looking like this...Yum!


IMG_3443

The aroma floating through my house was incredible. That is why the pie went to Thanksgiving missing a piece. I had to do a little "QA" as my husband would call it, before I took it to share. Lol. Next, I was able to customize my pie. It came with a packet of cream cheese icing to top it off with. It looked even better then when I had made a pumpkin pie from scratch in the past. Why have I not tried Mrs. Smith pies before?!

I was so excited that I grabbed another Mrs. Smith pie out of the freezer to try next! I knew I could fit in one more pie before we left for Thanksgiving with the family. I chose the Cherry Pie with Butter Fudge Sauce next.

MRS.SMITH'S® Signature Deep Dish Cherry Pie with Butter Fudge Sauce

Did you know there is also a Deep Dish Dutch Apple Pie and a Deep Dish Peach Pie? Which one would you like to try first?? My favorite was the pumpkin pie because it was perfect for Thanksgiving. However, by enjoying one of these pies with family and friends you can't go wrong. Maybe they will ask for my secret recipe. Then I will have to direct them to the freezer section at Walmart for a Mrs. Smith Signature Deep Dish Pie.

Would you like to try one of these amazing pies? Share with me which type of pie you would try first and follow Mrs. Smith's on Facebook and Pinterest. One lucky winner will receive a coupon to try a Mrs. Smith's pie and a $50 Williams-Sonoma Gift Card. Please make sure you comment on what you would buy at Williams-Sonoma as well with your gift card. I can't wait to hear from you!

Visit Sponsor's Site

Sunday, November 25, 2012

DIY Child Size BBQ Grill

Hello! I hope you all had a wonderful Thanksgiving. We have been out of town for a few days and we are glad to be home. Our family has had such a busy month, and I would be crazy to think December would be any less then the same. In the last 6 weeks we have probably been to 9 or 10 birthday parties. I decided I needed to start making some of my gifts by the 4th or 5th one. Therefore, I whipped up two of these child size BBQ grills for two different sweet little boys.

 
Supplies:
 
Red plastic bowl
1 1/4" dowel rod
1" x 2" wood
1/4"-1/3" dowel rods
Wood glue
Drill
3 screws and washers
Silver spray paint
 
Let me start by saying I did these without my husband's assistance, which proves they are simple to make. However, if you have not used a saw before please get some safety lessons first!
 
Directions:
 
1. Cut two 1" x 2" pieces of wood to the appropriate length to slide into your bowl. I cut a 45 degree angle at both ends to help them fit snugly.
 
 
2. Cut small dowel rods as shown above. Make sure you allow room for them to hang off both sides of the bowl.
 
3. I marked my wood and put the design on a flat surface for the next step. Use wood glue to adhere your small dowel rods to the 1" x 2" pieces of wood at your marks.


4. Spray your grill top silver. (It remains removable.)
 
5. Cut 3 pieces of 1 1/4" dowel rod for your legs. I made my grill short for the 1-3 year old age range. I cut the top of the dowel rods at a 45 degree angle.
 
6. Next, I  drilled holes in the top of my dowel rods (the 45 degree angle section) and I drilled holes in the bottom of my red plastic bowl.
 
7. Drill your screws in place with a washer between the screw head and the red plastic bowl.

 
I made up a little grill basket to go with the grill and I had a little apron monogrammed to match.

 
Next, I tied it up in a cellophane wrap for a special birthday delivery!

 
I almost didn't make it out of the house with the child size grill because my 2 year old wanted to keep it!
 
 
Optional: You may want to put some supports between the legs if necessary. One of my plastic bowls held it securely without supports. However, the other style I bought did not. Just a tip.
 
I am wishing now I had taken a few more pictures along the way. Please let me know if the description does not make sense and I would be glad to help! Good luck! This would make a fun Christmas gift for a little boy or girl too. I think handmade unique gifts for kids are often the biggest hit!
 

Sunday, November 18, 2012

Simple Bedside Table Book Decor

I have been helping my friend Emma decorate her new house. She was having a house warming party, and I went over to help all her pictures and decor around her home. I quickly realized we needed some small accents for her tables and dressers. The next day, I went on a garage sale treasure hunt. Her room has an orange and turquoise comforter and accents, so when I found these two old hard back books, I knew they would match perfectly. Did I mention this project cost me 70 cents total?

 
I paid 10 cents a book and I bought a jeweled lace head band for 50 cents. When I got home I cut a piece of burlap 4" wide. I cut off the rubber band portion of the head band, and wrapped it around the burlap. With a simple tie and a few spots of hot glue, my project was done in less then 5 minutes! It looked amazing on my friend's bedside table and matched perfectly!!
 

Tuesday, November 13, 2012

Thanksgiving Games

Are you looking for some fun games to keep the kids entertained while Thanksgiving is being prepared? Here are two unique games we made last year. I pulled them out with our tub of Thanksgiving books and they have been a huge hit again with my boys.
 
 
Click here to see how to make The Crazy Turkey Game.
 
Game Directions:
 
Each player gets a turkey head and six clothespins of different colors. The first player roles the dice. The player gets to put on the feather color (clothespin) they roll on the dice. Take turns trying to collect all of your different colored turkey feathers. If you roll a color you already have, the turn goes to the next player. The first person to have all six different feathers (clothespins) shouts Gobble, Gobble, Gobble and wins the game!

Or...you can just buy one...


Click here for instructions on how to make the Acorn Game.
 
How to Play the Game:
Start your squirrel at the bottom. The first player rolls the dice and moves the number of spaces on the dice. If you land on the leaves, do nothing. If you land on acorns, collect the number of acorns on the square from the acorn pile. If you land on the turkey, you lose one acorn back to the pile. Take turns rolling the dice. Once a player rolls enough to land on the acorn tree, or past, collect an acorn for making it home. Go back to start on your next turn, and try to collect more acorns and race home. Once all of the piles of acorns have been collected, the squirrel (player) with the most wins!
 
Do you have any fun games you make for the Thanksgiving Holiday???


Sunday, November 11, 2012

Embroidery Hoop Wall Decor Tutorial

As you all know, I have two little boys, so it is a rare treat for me to work on girlie projects. I was asked to help with some embroidery hoop wall decor a few months ago for a little girl's room and I was so excited. I even learned a fun new chain stitch in the process. This is a darling little girl named Kennedy's room. Her favorite word happens to be TWIRL. I love this inexpensive way to add art to a little girl's room.

 
Supplies:
 
Embroidery hoops of different sizes
White paint
Fabric and/or felt
Needle
Embroidery thread
 
Directions:
 
1. Begin by spray painting your embroidery hoops white (or color of your choice)
 
2. I worked on the chain stitch hoop first. Place your fabric in the embroidery hoop and ensure the fabric is taut. I drew on the black fabric with a pencil to outline my design. (They do make special fabric pens for this purpose if you have one)
 
3. Now for the chain stitch...
 
Working the Chain Stitch
Picture from Cheryl C. Fall from About.com
 
The chain stitch is simple, but it still took me quite a bit of time to complete this part of the project.


4. Trim the excess fabric from your embroidery hoop.


5. Each of the other three decorative embroidery hoops had unique fabrics. One was white lace, another was a pink print, and the last one was grey felt with three felt hearts stitched on top.
 
 
It was quite a simple way to glam up a little girls room with some very inexpensive art!


Friday, November 9, 2012

The Candy Witch...Bye Bye Halloween Candy!


Are you wondering what to do with all of your child's extra or leftover Halloween candy?? It was about four days before Halloween, and I was already dreading the bags of candy the kids would be bringing home. They had already received Halloween treats throughout the month at various parties, events, and at school. They would beg each day to eat a few pieces of candy and I would have to carefully limit them to what I deemed a reasonable amount. The thought of a new endless supply of candy treats was dreadful!
 
That is when I dreamed up Clarabella the Candy Witch. If I was going to make this idea a success, I knew I would have to give it some gusto. I wanted to negotiate with my kids to give up the majority of their candy. Here is the little story I wrote. My boys received it in the mailbox a few days after Halloween.
 
There once was born a little witch named Clarabella. Apparently, each witch is born, and gifted by the Great witch, with a unique gift or talent of their very own. Clarabella was born with the sweetest tooth of all. She loves candy with every ounce of her body and she is happiest when she is surrounded by treats of all kinds.

Clarabella loved candy so much that she built her entire house of candy. She has chocolate bars on her doors, licorice sticks on her window panes, and sour straws to tie her shower curtain up. Each piece of candy serves as an important part of her home.

However, each summer the chocolate on her home melts to candy puddles. The licorice becomes sticky from the rain and falls off her window panes, and the sour straws become loose and her shower curtain falls to the floor. Her candy home usually only lasts one year and then comes tumbling down.

Clarabella asks each year for help from little boys and girls just like you. She desperately needs your candy to help rebuild her home. The best part is Clarabella wants you to keep some candy for your very own. Fill a jar for you to keep, and mail the rest to her to keep. In exchange for your generous gift, she will mail back your box with a load full of little gifts.

Now that Halloween is over, and your treat bag is overflowing…Could you help Clarabella rebuild her home?

Please mail packages to:

Clarabella Witch

2202 Candy Expressway


Please wait 3-4 days to allow time for Clarabella to receive your package and return your box with new treasures.

*********************************************************
 

My oldest (4 ) was already playing outside when I handed him the letter. He quickly asked me to read it. He had a puzzled expression on his face while I read it. I was thinking...oh no...maybe this is not going to work after all. When I stopped reading the story he looked at me and said, "Mom, do you think it will work?" I of course replied yes. Then he said, "I need a jar fast! I have to send her my candy!" He jumped off the toy he was playing on and ran inside.

I sighed with relief that it actually worked. He quickly filled up a box with the candy to send and kept a mason jar of candy for himself. Yes, the jar was cram packed with candy, but it was a LOT less then was in the cardboard box.


I "mailed" the box of candy off to the Candy Witch. The day after I "mailed" the box of candy they were already asking, "Now how many days until I receive presents back?" A few days later, my boys received their box full of treasures back. I used a bunch of garage sale finds, but you could easily go to the dollar store and pick a few fun things up.

 
My boys tore into that box like it was Christmas!

 
They were obviously excited with their new treasures.

 
There was definitely no regret in trading in their candy. They played with their new toys and read their new books all day.


Clarabella the Candy Witch will be sending another trade in offer next year for sure!
  
Here is another cute idea I saw about a Book Fairy by East Coast Mommy. Click here to check it out.


Thursday, November 1, 2012

Chocolate Surprise!

One of my really dear friends Angela has a birthday this week. We are lucky enough to work together as nurses...that is how I met her. It seems like I tend to change jobs every 2-3 years. As a nurse, there are so many opportunities and I really enjoy new challenges. The best part is over the last 12 years as a nurse, I have met a lot of amazing people along the way. It makes me reflect on how all of my best friends entered my life by some stroke of amazing timing. I truly am lucky.
 
Anyways, we had a birthday celebration for Angela at work, and I made one of my mother-in-laws infamous recipes. It is one of our family favorites. It's official name is Chocolate Surprise! Warning...there is nothing healthy about this sugar rush.That is probably why it is sooo yummy!

 
Ingredients:
 
2 tubs cool whip
1 cup pecans, chopped
1 stick butter
1 cup flour
8 oz cream cheese
1 cup powdered sugar
1 small package of instant vanilla pudding
1 small package of instant chocolate pudding
3 cups of milk
Hershey Chocolate
 
Directions:
 
1. Combine one stick of butter, 1 cup chopped pecans, 1 cup flour. Flatten mixture into rectangular pan. (It will just barely cover)


2. Bake at 350 degrees for 20 minutes.

 
3. Allow crust to cool completely. Mix 8 oz cream cheese, 1 cup powdered sugar, and 1 tub cool whip. Layer mixture over cooled crust.

 
4. Mix small package of vanilla pudding mix, small package of chocolate pudding mix, and 3 cups of milk together. Mix for approximately 5 minutes and then spread over cream cheese layer.

 
5. Top with cool whip and sprinkle with chocolate shavings.

 
6. Enjoy!!
 
Did anyone notice the counter in the background changed? Ha. I tried to make this last night after a long evening of taking my kids trick-or-treating. It was after 10 pm, and I was trying to make this last minute. I went to mix the pudding and I could not get it to firm up. My husband finally looked at the box and told me that I had bought the bake and serve instead of the instant jello. Ugh!!! I was defeated. Well, I stopped at a grocery store on the way to work early this morning and finished the rest at work. Oh well, it was worth it!
 
Related Posts Plugin for WordPress, Blogger...