Thursday, December 6, 2012

31 Creative, Unique and Fun Elf on the Shelf Ideas

The Christmas tree has been up for a week now...and our little elf on the shelf Jingle has been on the prowl. If you have never seen this creepy cute little elf, and the story that accompanies him, you are missing out! I am constantly creating new adventures for our little elf. It takes tons of ideas to keep your elf on the shelf busy. I hope to help you find some ideas you have not seen before. Here are some of Jingle's latest mischiefs.
 
 
Jingle made his own stick horse to fit in at the corral

 
Making a cheerio necklace out of the supplies we accidentally left out

 
Just resting in his hammock


Look at my son's look of surprise last year when he realized the lego men had captured Jingle.


This is the original story. It is now plastered in every book store window...but it really lives up to its publicity hype. The elf flies back to Santa every night to report on how your child is doing. Oh...but make sure not to touch him or he will lose his magic!


I ran out of clever and creative elf on the shelf ideas last year, so I am started my research early thanks to Pinterest. I tried very hard to give credit where deserved, but so many pictures only linked back to flickr.com. Thanks everyone for these amazing and fun ideas!

Snow angel
Snow Angel

Elf on the Shelf ideas

Cars

ELF ON THE SHELF IDEAS
Fishing for goldfish

Elf on the Shelf ideas
Message in the snow

Elf on the Shelf Ideas
Soft place to snooze

elf on the shelf ideas
Staying warm with the cold

Pinned Image
Relaxing in the tub

Our elf with an umbrella under the water/ice dispenser on our fridge.
Trying to keep out of the rain
(water dispenser)

Elf Ideas

SO CUTE!
Parachuting daredevil

*
Settling for a long winter's nap

Elf mischief for Christmas
Photo by Jen Mcken

elf
Hot air balloon adventure

Elf
Start your engines!

Pinned Image
Bubble bath luxury


Elf Kisses by Kims Kandy Kreations with Printable


The Show is On by Clearly Candace


Elf Mummy by Clearly Candace


Christmas Countdown by Family Life is Great


Captured Elf by Thats Country Living


North Pole or Bust

Pinned Image

Harry Potter Elf


Sick Elf

Elf with Zhu-Zhu Pet Reindeer
When short on reindeer…why not?

Elf with Zhu Zhu Pet Reindeer


The captured bandit by Greeneacreshobbyfarm.blogspot.com

Ice Fishing by Greeneacreshobbyfarm.blogspot.com
 
Do you have any more fun ideas to share with me? I am always up for some new suggestions! Especially when they have already been kid-tested on your own little ones. Here is where Jingle will be in the morning...
 
 
Jingle pretending to be a piggy bank robber


Sunday, December 2, 2012

Fairy Land Little Girl Gift

Welcome to the magical and mystical fairy land! I made this little village a month ago for a birthday party gift for a sweet little girl. Apparently, fairies are the rage right now. I wouldn't know...I have two little boys. However, it ended up that my boys had just as much fun playing with it! This would be an awesome little DIY present for a little girl for Christmas.
 
 
I have to admit I had a LOT of fun making this little fairy village. I would have loved this as a little girl. I really enjoy toys that encourage a child's natural curiosity and imagination. This project is amazing for creative play.
 
Supplies:
 
Bird houses
Paint
Moss
Dirt
Artificial flowers and leaves
Twigs and branches
String or Yarn
Hot Glue
 
Directions:
 
I started transforming my bird houses to fairy houses first. I bought two of them at Michael's, and stumbled upon the other one at a garage sale. My husband helped enlarge the naturally small bird entry to fit a fairy instead.


Next, I began painting the fairy houses.


I hot glued leaves on to one of the homes to make it a bit more woodsy in appearance.

 
I set it up on a table to get my design layout. Small stumps cut from a dead tree branch served as a path. A stripped off portion of a tree became a bridge. Small logs were fashioned into outdoor benches.

 
In order to create the fairy land back drop, I drilled a small hole in some small pieces of wood. I was able to glue my fake trees (leaves) into them to stand upright.

 
I glued moss on the garage sale bird house find to help camouflage it into the fairy woods.

 
My 2 year old could hardly stand it as the fairy village was being transformed. He began to play with the miniature fairies as he walked them along the path to their homes.

 
The longer I built, the more ideas came to mind. I was able to carefully drill two holes in a small branch, tie yarn through the holes, and set up a swing for the lovely ladies.

 
Come and swing a spell!

 
Ta Da!  Welcome! Here is my new home. It even has a flower pot with flowers outside the front door.

 
My husband helped make a box with some landscape timbers and plywood. I used real dirt in the bottom with fake moss on top. It truly was magical as the burlap pennant sign reads. 


Oops. I almost forgot to mention the ladder. Another stick and yarn creation!

 
Here is fairy land as a bird's eye view. It looks so welcoming that even I would love to go stay for the weekend. Lol! Another sweet friend saw this creation in the works and has already nicely requested one for her daughter's birthday next week. I better get to work and fast!
 

Friday, November 30, 2012

Duck® Tape Holiday Projects

This is a Sponsored post written by me on behalf of Duck Brand® for SocialSpark. All opinions are 100% mine.

I am sure you all have seen Duck® Brand tape all over Pinterest and the internet. I am constantly amazed by the projects created by this inventive wonder. Do you even know why Duck® tape was invented? It appeared around World War II as a solution for multiple issues. It could repair trucks, cracked windows, seal containers, and much more. According to duckbrand.com, polycoat adhesives gave the tape its unshakable stick and polyethylene coating allowed them to laminate the tape to a cloth backing, making it extremely strong and flexible.

However, Duck® tape has become very popular in the crafting community. With the holidays around the corner I can only imagine the wonders I could make with holiday themed Duck® Brand tape. I made this santa soap last year with Duck® tape. Here are just a handful of fun ideas I found.

Santa Soap by Greene Acres Hobby Farm

Christmas crafts with colored duct tape

Christmas wreath by Chica and Jo

Christmas crafts with colored duct tape

Trees by Chica and Jo

Duct Tape Stocking and Holiday Gift Box

Stocking and Gift Wrap by JoAnns

  Duct-tape Christmas-tree design on cardstock

Christmas Card by Lowes

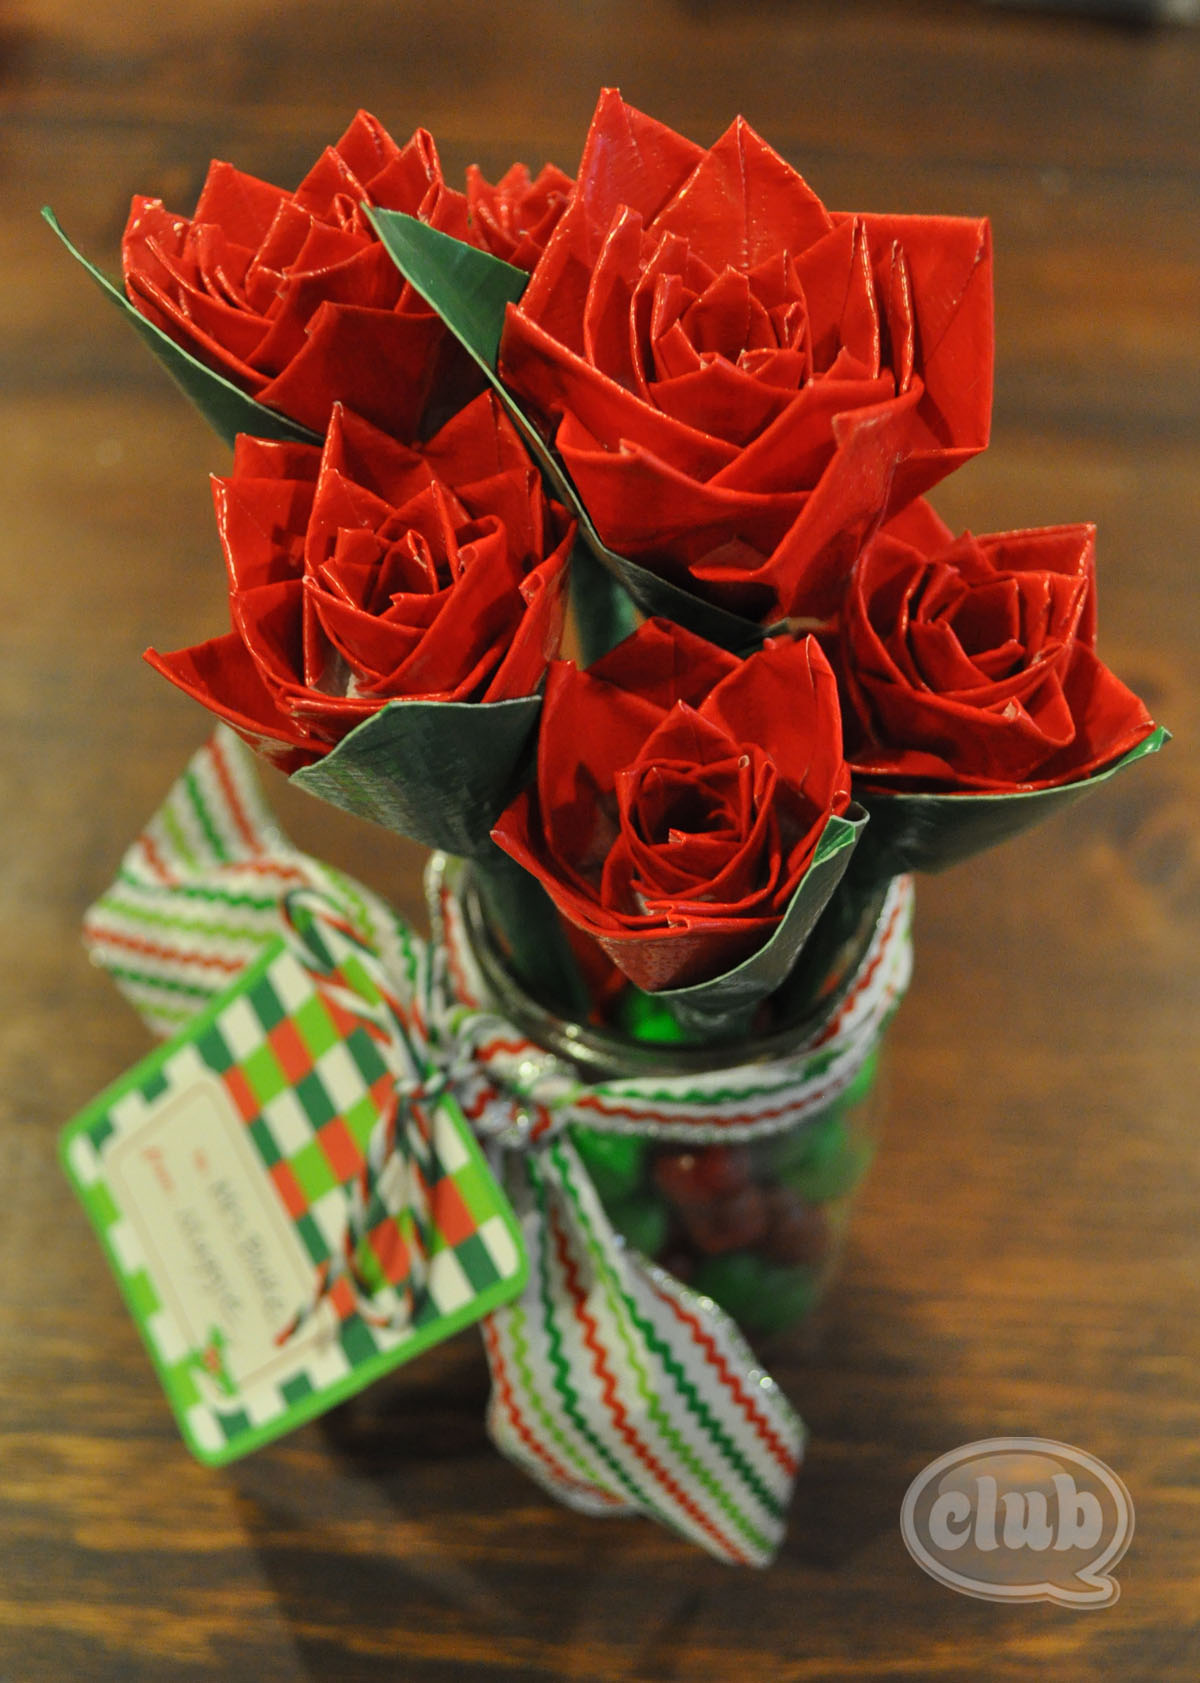
Rose Bouquet  by Club Chica Circle

Pinned Image

Clutch as a Gift by Valerie Creations

Do you love Duck® tape too? Become a fan of Duck® tape on Facebook. Share your ideas and see fun ideas from others.

You may also order Duck® tape online at duckbrand.com. I browsed their site for almost an hour looking at all of the fun prints and varieties of Duck® tape. I still think my favorite is the traditional peppermint style print. I would love to make some huge candy canes for my front yard!

Do you have any fun Duck® tape holiday projects on your agenda?


Visit Sponsor's Site

Thursday, November 29, 2012

Mrs. Smith Signature Deep Dish Pies

This is a Sponsored post written by me on behalf of Mrs. Smith's for SocialSpark. All opinions are 100% mine.

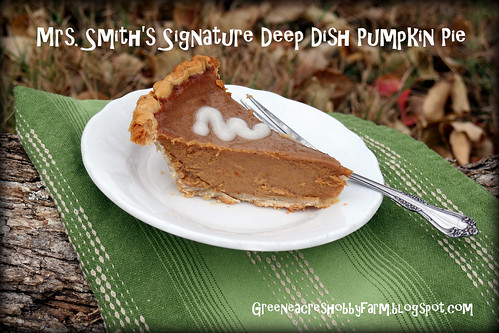
I was so excited when I was selected to try Mrs. Smith's Signature Deep Dish pies. I have never made a frozen pie myself, and with Thanksgiving around the corner, I was overjoyed to be able to let someone else make the pie (Mrs. Smith). I was more then willing to throw it in the oven and cook it! With two little kids running around my house excited about the prospect of seeing all of their grandparents and cousins for the holiday, cooking can be challenging. My boys not disturbing me while I was trying to cook, was not at the top of their list! The first pie I tried was the signature Deep Dish Pumpkin Pie. This is such a classic Thanksgiving food that I can not go without.

IMG_3445

MrsSmith.jpg

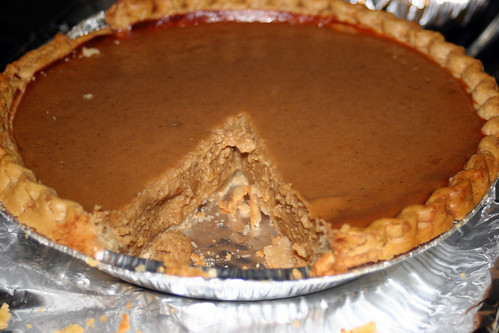
I followed the directions which were simple and well written. I removed the cover off the pie, left it in the foil pie pan, and placed it on a foil covered baking sheet. Voila. My pie was prepped to cook. I placed it in the oven at 350 degrees for 90 minutes. It came out looking like this...Yum!


IMG_3443

The aroma floating through my house was incredible. That is why the pie went to Thanksgiving missing a piece. I had to do a little "QA" as my husband would call it, before I took it to share. Lol. Next, I was able to customize my pie. It came with a packet of cream cheese icing to top it off with. It looked even better then when I had made a pumpkin pie from scratch in the past. Why have I not tried Mrs. Smith pies before?!

I was so excited that I grabbed another Mrs. Smith pie out of the freezer to try next! I knew I could fit in one more pie before we left for Thanksgiving with the family. I chose the Cherry Pie with Butter Fudge Sauce next.

MRS.SMITH'S® Signature Deep Dish Cherry Pie with Butter Fudge Sauce

Did you know there is also a Deep Dish Dutch Apple Pie and a Deep Dish Peach Pie? Which one would you like to try first?? My favorite was the pumpkin pie because it was perfect for Thanksgiving. However, by enjoying one of these pies with family and friends you can't go wrong. Maybe they will ask for my secret recipe. Then I will have to direct them to the freezer section at Walmart for a Mrs. Smith Signature Deep Dish Pie.

Would you like to try one of these amazing pies? Share with me which type of pie you would try first and follow Mrs. Smith's on Facebook and Pinterest. One lucky winner will receive a coupon to try a Mrs. Smith's pie and a $50 Williams-Sonoma Gift Card. Please make sure you comment on what you would buy at Williams-Sonoma as well with your gift card. I can't wait to hear from you!

Visit Sponsor's Site

Sunday, November 25, 2012

DIY Child Size BBQ Grill

Hello! I hope you all had a wonderful Thanksgiving. We have been out of town for a few days and we are glad to be home. Our family has had such a busy month, and I would be crazy to think December would be any less then the same. In the last 6 weeks we have probably been to 9 or 10 birthday parties. I decided I needed to start making some of my gifts by the 4th or 5th one. Therefore, I whipped up two of these child size BBQ grills for two different sweet little boys.

 
Supplies:
 
Red plastic bowl
1 1/4" dowel rod
1" x 2" wood
1/4"-1/3" dowel rods
Wood glue
Drill
3 screws and washers
Silver spray paint
 
Let me start by saying I did these without my husband's assistance, which proves they are simple to make. However, if you have not used a saw before please get some safety lessons first!
 
Directions:
 
1. Cut two 1" x 2" pieces of wood to the appropriate length to slide into your bowl. I cut a 45 degree angle at both ends to help them fit snugly.
 
 
2. Cut small dowel rods as shown above. Make sure you allow room for them to hang off both sides of the bowl.
 
3. I marked my wood and put the design on a flat surface for the next step. Use wood glue to adhere your small dowel rods to the 1" x 2" pieces of wood at your marks.


4. Spray your grill top silver. (It remains removable.)
 
5. Cut 3 pieces of 1 1/4" dowel rod for your legs. I made my grill short for the 1-3 year old age range. I cut the top of the dowel rods at a 45 degree angle.
 
6. Next, I  drilled holes in the top of my dowel rods (the 45 degree angle section) and I drilled holes in the bottom of my red plastic bowl.
 
7. Drill your screws in place with a washer between the screw head and the red plastic bowl.

 
I made up a little grill basket to go with the grill and I had a little apron monogrammed to match.

 
Next, I tied it up in a cellophane wrap for a special birthday delivery!

 
I almost didn't make it out of the house with the child size grill because my 2 year old wanted to keep it!
 
 
Optional: You may want to put some supports between the legs if necessary. One of my plastic bowls held it securely without supports. However, the other style I bought did not. Just a tip.
 
I am wishing now I had taken a few more pictures along the way. Please let me know if the description does not make sense and I would be glad to help! Good luck! This would make a fun Christmas gift for a little boy or girl too. I think handmade unique gifts for kids are often the biggest hit!
 
Related Posts Plugin for WordPress, Blogger...